
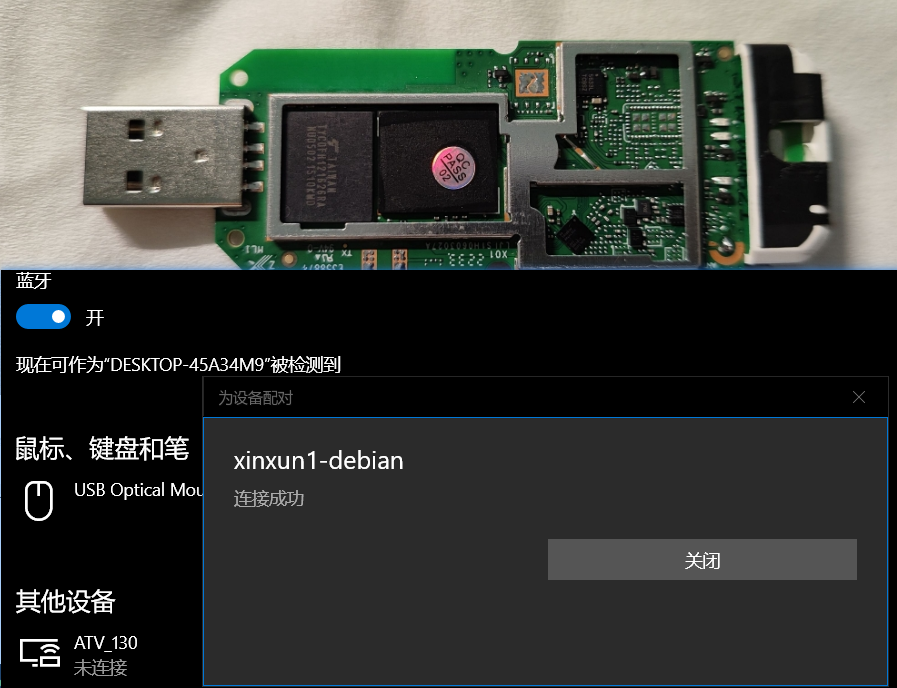
随身Wifi通过蓝牙连接其他设备
1.随身wifi蓝牙相关的内容在话题里不多,找了下.按着试了下不成功,网上也没找到这方面的内容,就换了下思路搜了下树莓派连接蓝牙,然后打开新世界的大门,测试成功了.
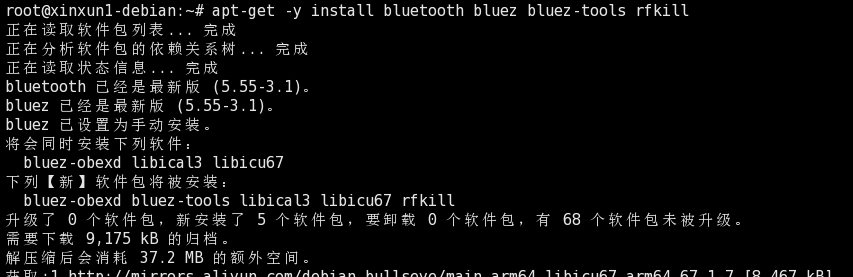
2.安装相关软件
root@xinxun1-debian:~# apt-get -y install bluetooth bluez bluez-tools rfkill |
让按yes就按yes
3.添加用户到蓝牙组(假设用户名为root)
root@xinxun1-debian:~# usermod -G bluetooth root |
4.重启随身wifi
root@xinxun1-debian:~# reboot |

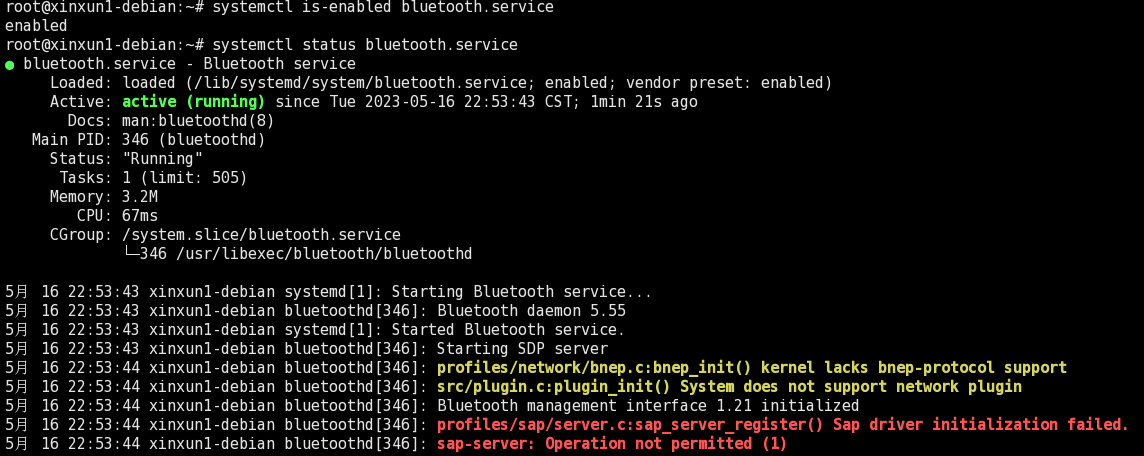
5.蓝牙设备应启动并启用:
root@xinxun1-debian:~# systemctl is-enabled bluetooth.service |
root@xinxun1-debian:~# systemctl status bluetooth.service |
6.请确保未禁用蓝牙
root@xinxun1-debian:~# rfkill |

7.使用bluetoothctl连接到蓝牙设备
7.1启动bluetoothctl交互式命令:
root@xinxun1-debian:~# bluetoothctl |
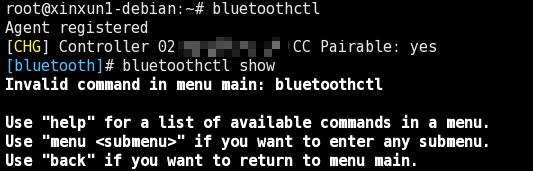
[bluetooth]# bluetoothctl show |
7.2打开你的蓝牙适配器:
[bluetooth]# agent KeyboardOnly |

[bluetooth]# default-agent |

上电控制器
[bluetooth]# power on |

开启扫描
[bluetooth]# scan on |
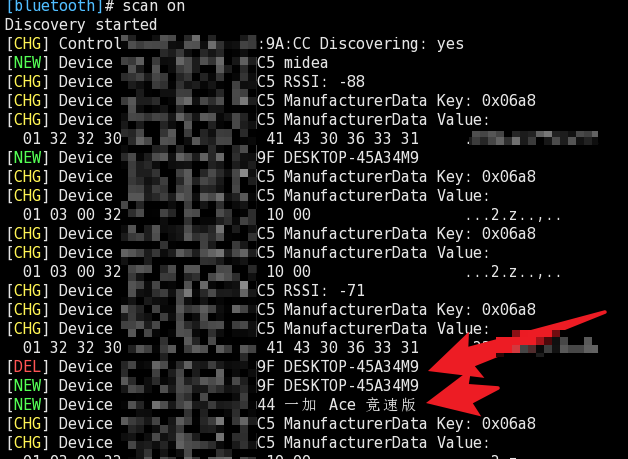
注意:这个是注释:关闭扫描则是scan off
7.3与发现的蓝牙设备配对(注意这5C:xx:xx:xx:xx:C6这些就是你扫描出来设备的地址)
[bluetooth]# pair 5C:xx:xx:xx:xx:C6 |
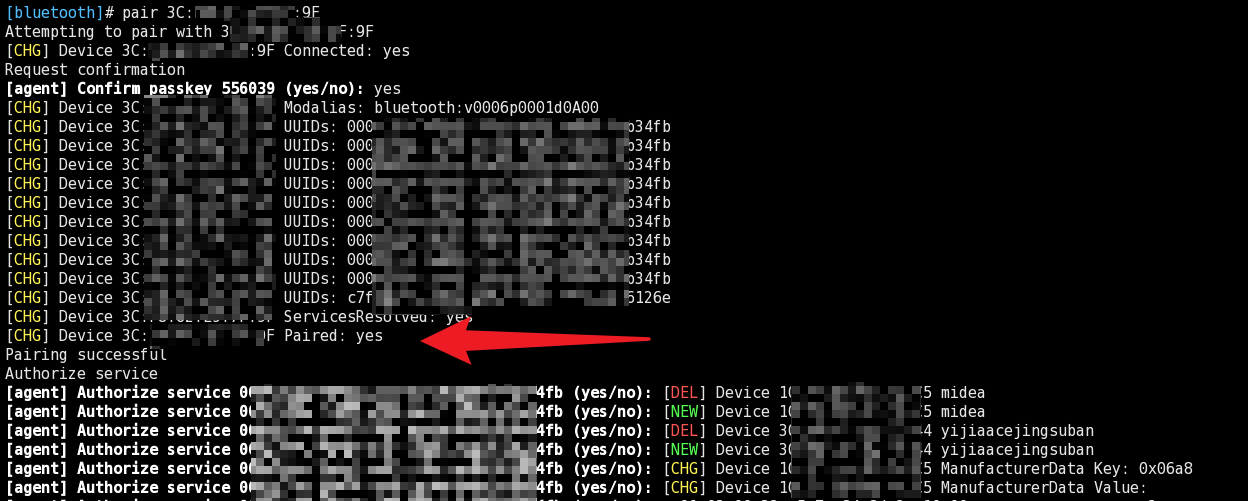
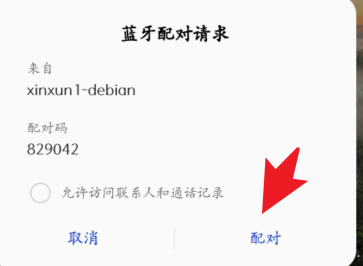
配对会出现pin码,如果一致,在其他设备上点击配对啥的,然后在上边这窗口输入yes
信任设备
trust 5C:xx:xx:xx:xx:C6 |
[CHG] Device 5C:xx:xx:xx:xx:C6 Trusted: yes
Changing 5C:xx:xx:xx:xx:C6 trust succeeded
paired-devices |
Device 5C:xx:xx:xx:xx:C6
devices |
Device 5C:xx:xx:xx:xx:C6
7.4配对后连接到设备:
connect 5C:xx:xx:xx:xx:C6 |
Attempting to connect to 5C:xx:xx:xx:xx:C6
[CHG] Device 5C:xx:xx:xx:xx:C6 Connected: yes
Connection successful
显示有关设备的信息
[你其他的设备名]# info |
8.打开电源时打开蓝牙适配器
要在Linux系统启动时打开蓝牙适配器的电源,请打开配置文件:
$ sudo vim /etc/bluetooth/main.conf |
添加行:AutoEnable=true,如下:
[Policy] |
至此,操作完成。
参考:
1.https://zhuanlan.zhihu.com/p/537174819 |
本博客所有文章除特别声明外,均采用 CC BY-NC-SA 4.0 许可协议。转载请注明来自 九怀!
 wechat
 alipay